
Written by Lucas Mason
There are few things more frustrating in the modern digital age than lining up the perfect shot—a sunset, a child’s first steps, or a crucial document—only to find that your phone’s camera is blurry, shaking uncontrollably, or refusing to focus. In an era where our smartphones function as our primary memories keepers, a malfunctioning camera isn’t just a technical inconvenience; it’s a disruption to how we document our lives.
At Reparation Tech, we have diagnosed thousands of devices with camera instability issues. Whether you are an iPhone user experiencing the dreaded “death rattle” or an Android user dealing with persistent focus hunting, the root cause usually falls into two categories: software glitches or mechanical hardware failure.
In this comprehensive guide, we will walk you through the troubleshooting steps used by professional technicians. We will help you determine if a simple cleaning will suffice, if a software reset is required, or if the delicate Optical Image Stabilization (OIS) mechanism has failed, requiring professional intervention. While many camera issues can be resolved at home, recognizing when to seek expert help is vital to preventing further damage to your device.
Note: This guide covers troubleshooting for major manufacturers including Apple, Samsung, and Google Pixel. If you are unsure about performing any steps, please visit ourÀ propos de nouspage to learn more about our certified technicians who can assist you.
Section 1: Diagnosing the Problem – Why is My Camera Blurry?
Before you can fix the issue, you must understand what is causing it. A blurry camera is rarely just “broken”; it is usually a symptom of a specific underlying condition.
1.1 The Dirty Lens Hypothesis
It sounds simple, but over 40% of “blurry camera” issues brought into our locations are simply due to a dirty lens. Your phone spends its life in pockets, purses, and hands, accumulating natural oils, lint, and dust.
- The Symptoms: A general “foggy” look to photos, light streaks (lens flare) around lamps or the sun, or inability to focus on close objects.
1.2 Software Glitches and Cache Errors
Modern smartphone cameras are heavily reliant on software. They use AI to process images, manage focus, and balance light. If the software that controls the camera crashes or the temporary data (cache) becomes corrupted, the camera may fail to launch, freeze, or refuse to focus.
- The Symptoms: The camera app crashes immediately, the screen is black, or the focus “pulses” in and out without locking on.
1.3 Optical Image Stabilization (OIS) Failure
This is the most serious hardware issue. Most flagship phones (iPhone Pro models, Samsung S series) use OIS. This involves the lens physically floating in a magnetic field to counteract hand movements. If the device is dropped or exposed to high-frequency vibrations (like a motorcycle engine), this mechanism can break.
- The Symptoms: You hear a buzzing or clicking sound coming from the camera module, or the image on the screen shakes violently even when the phone is on a stable surface.
Section 2: The Science of the Shake (Understanding Hardware)
To understand why DIY fixes sometimes fail, it helps to understand the technology inside your device.
How OIS Works
Optical Image Stabilization uses gyroscopes and tiny motors to shift the camera lens in the opposite direction of your hand’s movement. If your hand moves left, the lens moves right. This results in smooth video and sharp low-light photos. However, this system is delicate.
The “Motorcycle” Effect
According to Apple Support, exposing your iPhone to high-amplitude vibrations within certain frequency ranges, specifically those generated by high-power motorcycle engines, can degrade the performance of the camera system. The vibrations can permanently damage the OIS gyros. If you mount your phone to a bike without a vibration dampener, you are at high risk for this specific failure.
If you suspect your device has suffered physical damage beyond repair, you might consider upgrading. You can browse our inventory to buy a device that is fully tested and guaranteed to have a working camera.
Section 3: Step-by-Step DIY Troubleshooting
If your camera is acting up, follow this “Process of Elimination” before paying for a repair.
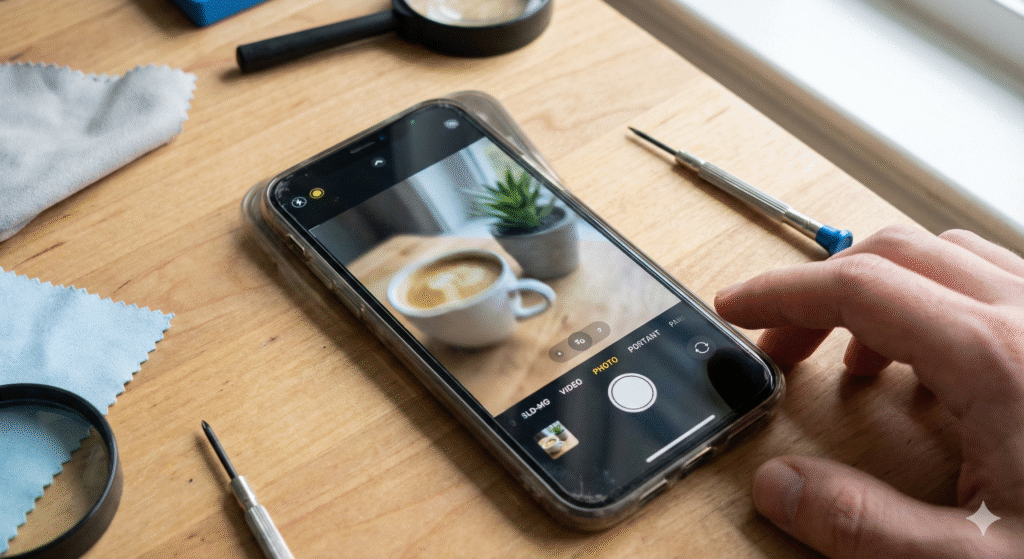
Step 1: The Professional Clean
Do not use your shirt or a napkin. These materials can scratch the specialized coatings on modern camera lenses.
- Materials: Use a microfiber cloth and a lens cleaning solution (or a tiny amount of distilled water).
- Method: Gently wipe in a circular motion.
- Inspect: Look closely at the glass. Is there a crack over the camera? If the exterior glass is cracked, it will refract light and cause blur. This requires a glass replacement, which you can get an Devis instantané. for on our website.
Step 2: Remove Accessories
Magnetic cases and metallic lens protectors are common culprits.
- Magnets: Because OIS uses magnets to float the lens, a strong magnetic case can interfere with the field, causing the lens to “stick” or vibrate. Remove your case and test the camera.
- Lens Protectors: Cheap tempered glass protectors over the camera lens often cause autofocus issues and internal reflections (ghosting). Remove them to see if clarity returns.
Step 3: Clear Camera Cache (Android)
On Android devices, corrupted cache data is a frequent cause of blur.
- Go to Settings > Apps.
- Find Camera.
- Select Storage & Cache.
- Tap Clear Cache. (Do not clear “Data” unless you backed up your settings, though this usually doesn’t delete photos).
Note: On iPhones, there is no “Clear Cache” for the camera. You must close the app (swipe up) or restart the phone.
Step 4: Safe Mode Testing
Third-party apps (Snapchat, Instagram, TikTok) sometimes hijack the camera driver and don’t release it properly.
- Android: Hold the power button, then long-press “Power Off” on the screen until “Reboot to Safe Mode” appears.
- iPhone: There is no “Safe Mode” equivalent for apps, but you can revoke camera permissions for all apps in Settings to test. If the camera works perfectly in Safe Mode, a third-party app is the problem. Uninstall recently downloaded apps one by one.
Section 4: Advanced Troubleshooting & Factory Resets
If the basic steps failed, we are looking at a deeper software conflict or hardware failure.
The Factory Reset
This is the “nuclear option.” It wipes your phone clean.
- Backup your data: Ensure your photos, contacts, and messages are saved to the cloud.
- Perform the Reset: Go to Settings > General > Transfer or Reset (iPhone) or Settings > System > Reset Options (Android).
- Test Immediately: Set up the phone as new (do not restore the backup yet) and test the camera.
- If it works: The issue was corrupt software in your previous backup.
- If it still blurs/shakes: You have a hardware failure.
At this stage, if the device is still faulty, it is likely a broken OIS module or a sensor defect. You have two choices:
- Repair the device with a professional component replacement.
- Sell the device as-is (for parts) and put the money toward a new one.
Section 5: When to Seek Professional Repair
There are certain symptoms that no amount of software troubleshooting can fix. Recognising these early saves you time.
1. The Audible “Buzzing”
If you open your camera app and hear a physical buzzing, clicking, or whirring noise, the OIS electromagnets or springs have snapped or worn out. The camera is vibrating physically inside the housing. This is common in older phones or phones that have been dropped.
2. Liquid Damage
If you see condensation inside the camera lens glass, moisture has breached the seal. This “fog” cannot be wiped away. It requires opening the phone, drying it out professionally, and potentially replacing the camera module.
3. The “Black Spot”
If you see a dark spot in the same place on every photo, dust has gotten inside the sensor assembly (under the glass), or the sensor pixels are dead. This requires a camera replacement.
Why Professional Repair Matters
Replacing a modern smartphone camera is not easy. It involves:
- Melting water-resistant adhesives.
- Removing the screen (which breaks easily).
- Handling sensitive ribbon cables.
- Programming the new camera (especially for iPhones, which require serialization).
At Reparation Tech, we provide transparent tracking for your peace of mind. Once you drop off your device, you can Track Your Repair status online to know exactly when it is ready for pickup.
Section 6: Conclusion and Final Thoughts
A blurry or shaking camera essentially turns a flagship smartphone into a paperweight. While simple cleaning and software resets can resolve minor glitches, physical damage to the OIS system or the lens glass requires professional attention.
If you have tried all the steps in this guide—cleaning, restarting, safe mode, and factory resetting—and your photos are still out of focus, it is time to bring in the experts. Don’t let a broken camera ruin your memories.
Whether you need a quick repair, want to upgrade, or simply need advice, Reparation Tech is here to help. Visit our Location page to find the nearest store to you.
FAQs
Q1: How much does it cost to fix a shaking phone camera?
A1: The cost varies significantly by model. Replacing an iPhone Pro camera module is more expensive than a standard model due to the triple-lens OIS system. You can get an accurate price for your specific model by using our Devis instantané. tool.
Q2: Can a magnet ruin my phone camera?
A2: Yes, temporarily. Strong magnets (like those in car mounts or some wallet cases) can interfere with the OIS and autofocus mechanisms. Usually, removing the magnet resolves the issue, but prolonged exposure to very strong magnetic fields could theoretically cause lasting calibration issues.
Q3: Why is my camera blurry close up but fine far away?
A3: This is often an issue with the “Minimum Focus Distance.” Every lens has a limit on how close it can focus. If you are too close, the physics of the lens won’t allow it to sharpen. However, if your phone has a “Macro Mode” (like newer iPhones or Samsungs), ensure it is enabled. If it still fails, the focus motor may be jammed.
Disclaimer: The information provided in this blog post is for educational and informational purposes only. While we strive to provide accurate DIY troubleshooting steps, opening your device or attempting physical repairs yourself may void your manufacturer’s warranty and could cause further damage. Reparation Tech is not responsible for damages resulting from DIY repair attempts. If you are unsure, please consult a professional technician.